Jillur Quddus • 1 September 2020
Back to Course Overview
Introduction
Welcome to the first module of the Introduction to Python course. This course will provide an in-depth introduction to the Python 3.x programming language, with a curriculum aligned to the Certified Associate in Python Programming (PCAP) examination syllabus (PCAP-31-02). In this module we will define what exactly Python is and its high-level components before guiding you through how to setup a local development environment on your personal computer or laptop.
The source code for this module may be found in the public GitHub repository for this course. Where code snippets are provided in this module, you are strongly encouraged to type and execute these Python statements in your own Jupyter notebook instance.
1. What is Python?
Python is an open-source general purpose programming language. This means that it can be used to develop software for a wide variety of tasks. Today Python is used for a huge range of computer applications, from developing web services, content management systems and business applications such as Enterprise Resource Planning (ERP) and e-commerce systems to performing data exploration, transformation and analysis, image, audio and video processing, data science including machine learning, deep learning and natural language processing, and robotic process automation.
Python is a popular choice for those starting to learn computer programming for the very first time because it is easy to learn, intuitive and is supported by a global community of active software engineers, data scientists and academics.
If you wish to become an active member of the global Python community, including joining an open Slack team for Python enthusiasts and accessing further educational resources, please visit https://www.python.org/community for further information.
1.1. Python Modules and Packages
Python code is usually written to a file with the extension .py. A single .py file is referred to as a Python module. As your Python programming skills become more advanced, you start to develop larger and more complex applications. Modules are a way to undertake modular programming - that is, breaking down your large and complex applications into a series of individual modules, where each module performs a smaller and more specific task. A collection of Python modules that together form a wider application or library is called a Python package. We will discuss Python modules and packages further in module 7 of this course.
1.2. Python Standard Library
Python, like most other programming languages, comes pre-bundled with an extensive library of standard modules which together is referred to as the Python Standard Library. These standard modules extend the basic Python language by providing access to the most commonly used operations. For example, if you wanted to access the current system datetime, transform text into uppercase or perform basic mathematical operations on numbers, rather than writing the code to do these things from scratch, the Python Standard Library of modules provides this functionality out-of-the-box. That way, you can concentrate on the specific logic of your application rather than developing basic operations from scratch.
This course will largely cover the core components of the Python Standard Library. To learn more about these standard modules, please visit https://docs.python.org/3/library/.
1.3. Python Interpreter
Python is an interpreted language. This means that each line of your Python source code is read, verified, translated into something called byte code (low-level machine code) and executed - if an error is encountered, the program will halt at that point and an error message is returned. In Python, the program that does this is called the Python Interpreter. Fortunately, the Python Interpreter comes bundled with Python so all you have to worry about is writing the Python source code itself. This also means that your Python programs are portable - as long as the machine that you wish to execute your Python program on has a Python Interpreter installed on it, your Python program will execute.
1.4. Python Memory Manager
Python comes bundled with the Python Memory Manager. The Python Memory Manager is responsible for managing the space in your computer's memory where the variables, objects and data structures (more on these later) that you create in your Python source code reside. It does this by communicating with the underlying operating system on your machine and is managed by the Python Interpreter - this means that as a beginner Python programmer, you don't have to immediately worry about memory management as it is abstracted away from you. But it is useful to know that it exists and that when you execute your Python programs, operations are undertaken in your computer's memory to compute and execute your Python commands - especially when you start doing more memory intensive tasks such as data analysis, image processing and machine learning in Python.
1.5. Python Versions
Finally, Python currently has two major version branches - Python 2.x and Python 3.x. Python 2.x is legacy, and reached end of life status in January 2020 (which means that it will no longer be officially supported). Hence you should use Python 3.x as the default option as it includes core language syntax changes and improvements to make it more consistent and easier for beginners to learn. One of the few reasons that you may wish to continue using Python 2.x is if you are using a 3rd party Python package in your program that has not yet been upgraded to Python 3.x. However that situation is becoming less frequent as the community moves to Python 3.x.
2. Local Development Environment
Now that we have an understanding of what Python is, let us install Python (and hence the Python Interpreter) onto our local machine.
In this section, we will assume that you have a personal computer or laptop with, as a minimum, a 1GHz processor, 4GB of RAM, 25GB of hard drive space and a monitor display resolution of at least 800 x 600. The following instructions also assume that you are using a 64-bit Windows operating system, but Python will work with any major operating system class, including Linux (such as Red Hat Enterprise Linux, CentOS and Ubuntu) and MacOS. In fact, many Linux distributions will come with Python already installed.
2.1. Python Distributions
The simplest option to install Python onto our local machine is to download Python from the official Python Software Foundation website https://www.python.org. This will provide you with the Python Interpreter and the Python Standard Library, enough to get you started developing basic Python programs.
However as your Python programming skills become more advanced and you develop more complicated applications, the Python Standard Library may no longer offer all the functionality that you need. Often you may wish to incorporate and utilise modules and packages that others in the global Python community have developed into your own Python applications so that you don't end up reinventing the wheel as it were. In this case, it is more convenient to download a Python distribution - that is, the Python Interpreter bundled with the most commonly used and useful 3rd party Python packages that have been pre-tested to work with the version of Python in question.
2.2. Anaconda
Anaconda is a Python distribution focused on data science - that is, the Python Interpreter bundled with over 400 of the most commonly used 3rd party Python packages related to data exploration, transformation, analysis, statistical modelling, visualisation and predictive intelligence. In this course, we will download, install and use the open-source community version of Anaconda to learn Python 3.x.

2.3. Installing Anaconda
The following section details how to install Anaconda on a machine running the Windows operating system. Alternatively, please select the following links for details on how to install Anaconda on Linux or MacOS respectively.
- Download the open-source Anaconda distribution for Python 3.x from Anaconda. At the time of writing, the latest open-source version of Anaconda is for Python 3.8.
- Once downloaded, double-click the .exe file to launch the installer.
- Read through and agree to the Anaconda End User License Agreement.
- Select the installation type. If you select 'All Users' then you will be prompted to enter the authentication details for a user with Windows Administrator privileges. For the purposes of this course, selecting 'Just Me' is recommended.
- Select a destination folder in which to install Anaconda. IMPORTANT NOTE: you should install Anaconda to a directory path that does NOT contain any spaces, for example C:\Users\username\anaconda3.
- For the purposes of this course and as a beginner Python programmer, please leave the Advanced Installation Options to their default settings - that is, do not add Anaconda to your PATH environment variable but register Anaconda as your default Python 3.x. instance.
- Click the Install button to install Anaconda. It will take approximately 5 - 10 minutes to complete the installation of the Python 3.x Interpreter along with the 400+ 3rd party Python packages.
- Once the installation is complete, select Finish.
2.4. Conda and PIP
We now know that Anaconda is a Python distribution bundled with over 400 of the most commonly used 3rd party Python packages. In order to manage these packages, including installing new packages and updating existing ones, Anaconda comes bundled with Conda - an open source package management system that can be invoked via the command line. Whilst the full list of available Conda commands is beyond the scope of this course, provided below is a subset of the most commonly used Conda commands:
# Check that Conda is installed
conda info

# Update Conda
conda update conda

# Install a package from the default Anaconda remote repositories
conda install <package name>

# Update an existing package
conda update <package name>

# Create a new virtual Anaconda environment
conda create --name <environment name> python=<Python version e.g. 3.8>

# Activate an environment
source activate <environment name> # MacOS and Linux
activate <environment name> # Windows

# List all environments
conda env list

# List all installed packages and their versions in the current environment
conda list
To learn more about managing Conda environments, please visit the Managing Environments Conda webpage.
Alternatively we can manage packages using PIP - the de-facto standard package manager for Python that is included by default from Python 3.4 and onwards, and is the Python Packaging Authority's (PyPA) recommended tool for managing Python packages. Whilst the full list of available PIP commands is beyond the scope of this course, provided below is a subset of the most commonly used PIP commands:
# Install a package from the default PyPI remote repository of Python packages
pip install <package name>

# Remove a package
pip uninstall <package name>

# Create and activate a new virtual Python environment
pip install virtualenv
python -m venv /path/to/new/virtual/environment
source /path/to/new/virtual/environment/bin/activate # MacOS and Linux
\path\to\new\virtual\environment\Scripts\activate # Windows

# List all installed packages and their versions in the current environment
pip list
To learn more about managing Python virtual environments, please visit the Virtual Environments and Packages Python webpage.
2.5. Python IDEs
To start writing Python source code, as a bare minimum one could use any text-editor of their choice, such as Notepad or Notepad++. However it is normally more convenient and efficient to use an Integrated Development Environment (IDE). An IDE provides you with a place in which to not only write source code, but to manage your development environment, autocomplete source code statements, highlight syntax and seamlessly integrate with software version control systems such as Git, amongst other benefits. There are numerous IDEs available for Python, some open-source and some commercial, including but not limited to:
- PyCharm
- PyDev
- Spyder (bundled with Anaconda)
- Visual Studio Code
2.6. Web-based Notebooks
In addition to desktop-based IDEs, notebooks are web-based applications that allow you to write and execute snippets of code and visualise the outputs immediately, all via an internet browser. As such, they are a great tool for beginners learning a new programming language for the first time, as well as for initial data exploration, visualisation and prototyping on smaller (or sample) datasets. Example web-based notebook applications include:
- Jupyter Notebook (bundled with Anaconda)
- Apache Zeppelin
There also exists cloud-hosted environments that support web-based notebooks, meaning that no local installation is required. The benefits of these environments include zero configuration and setup, free access to GPUs, and easy sharing and collaboration of notebooks. However these environments only provide limited resources in their free tiers (typically between 512MB and 1GB of RAM), and do not guarantee uptime, performance nor security. Example free and cloud-hosted environments that support Jupyter Notebook include:
- Google Colab (requires a Google Account as notebooks are saved to Google Drive)
- My Binder
For the purposes of this course, we shall use a local instance of Jupyter Notebook (bundled and installed with Anaconda and seamlessly integrated with the Python Interpreter by default) to learn Python 3.x.
Whilst web-based notebook are great for learning new programming languages, data exploration, visualisation and prototyping, they are not recommended for writing code intended for deployment to production environments. This is because they are difficult (but not impossible) to both execute as part of a schedule and to manage using version control software such as Git. Though recent efforts at organisations such as Netflix to productionise the usage and execution of notebooks via libraries including Papermill look promising, at the time of writing it is still recommended to use a desktop or cloud-based IDE such as Eclipse, Microsoft Visual Studio Code, PyCharm, PyDev or Spyder to develop production-grade Python code.
2.7. Starting Jupyter Notebook
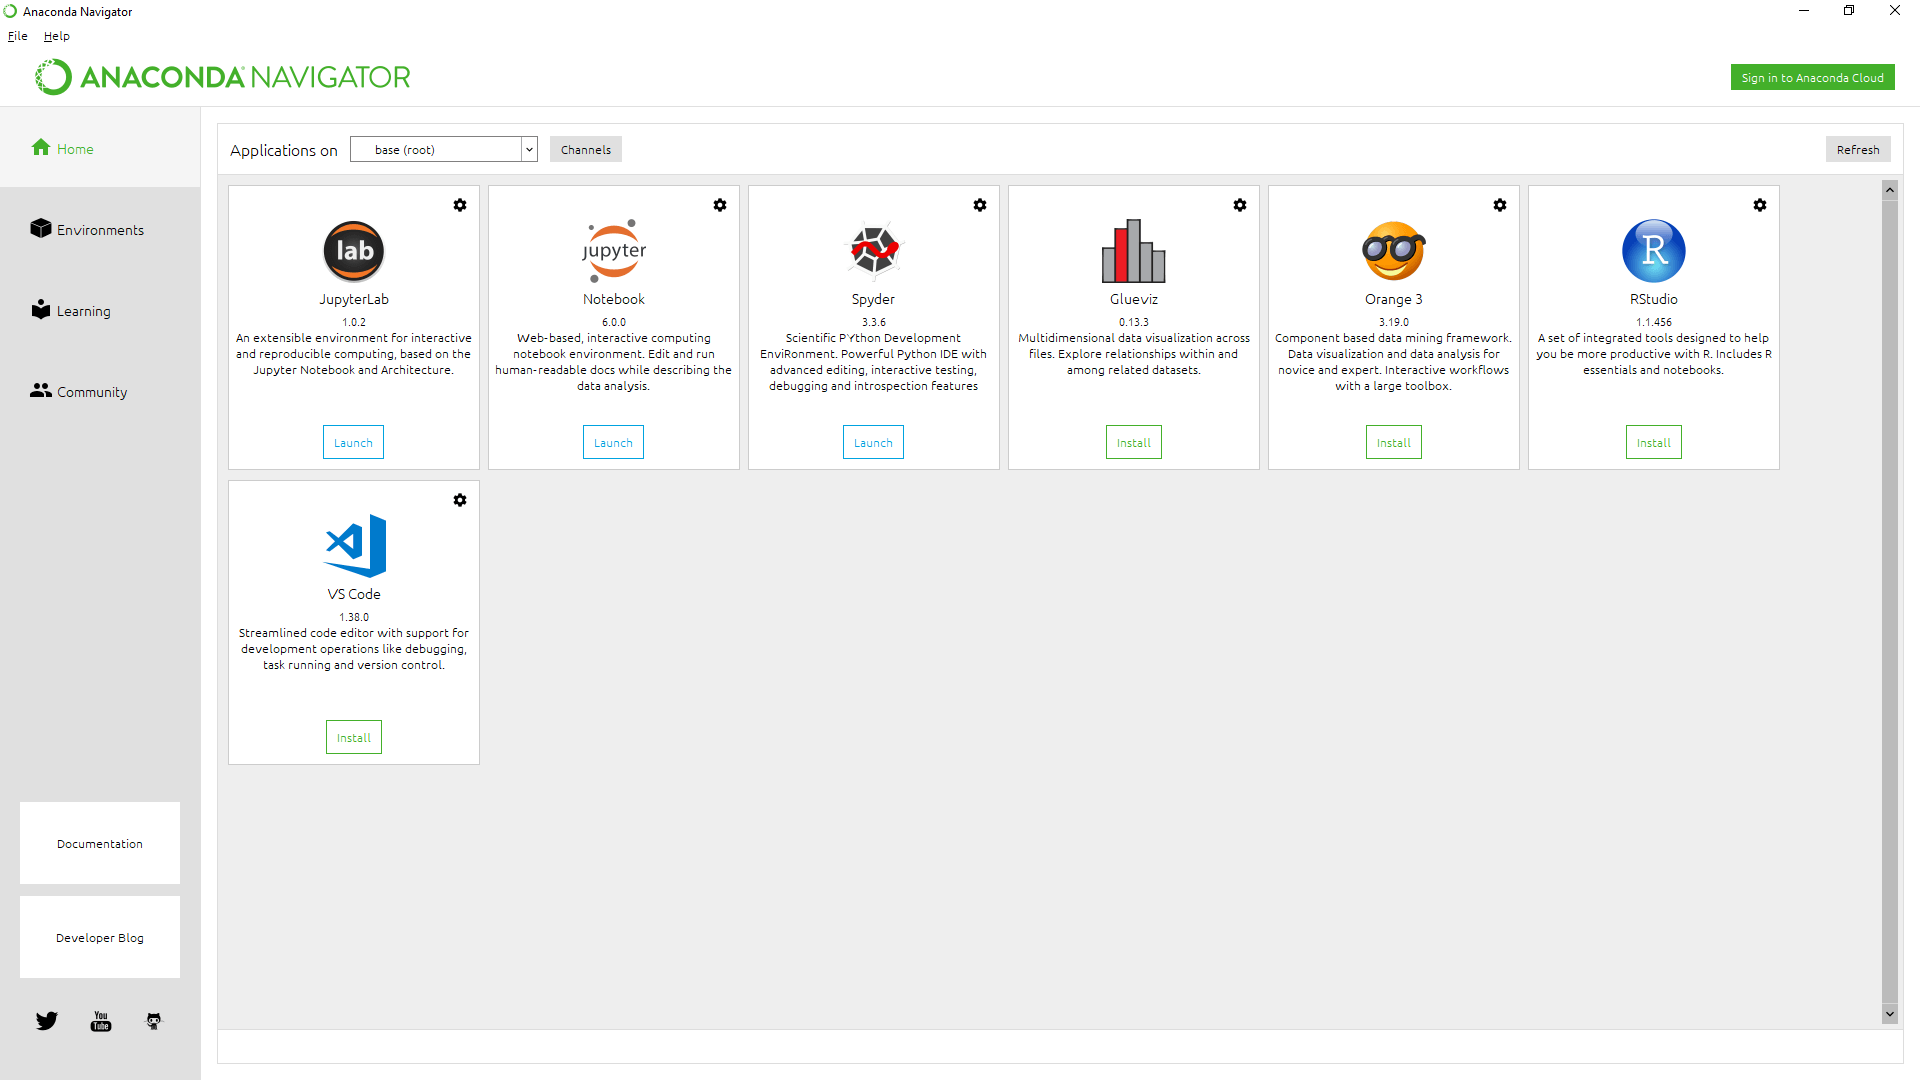
To start Jupyter Notebook, open the Windows Start Menu (or equivalent on MacOS or Linux), search for and select Anaconda Navigator. The following application should be returned:

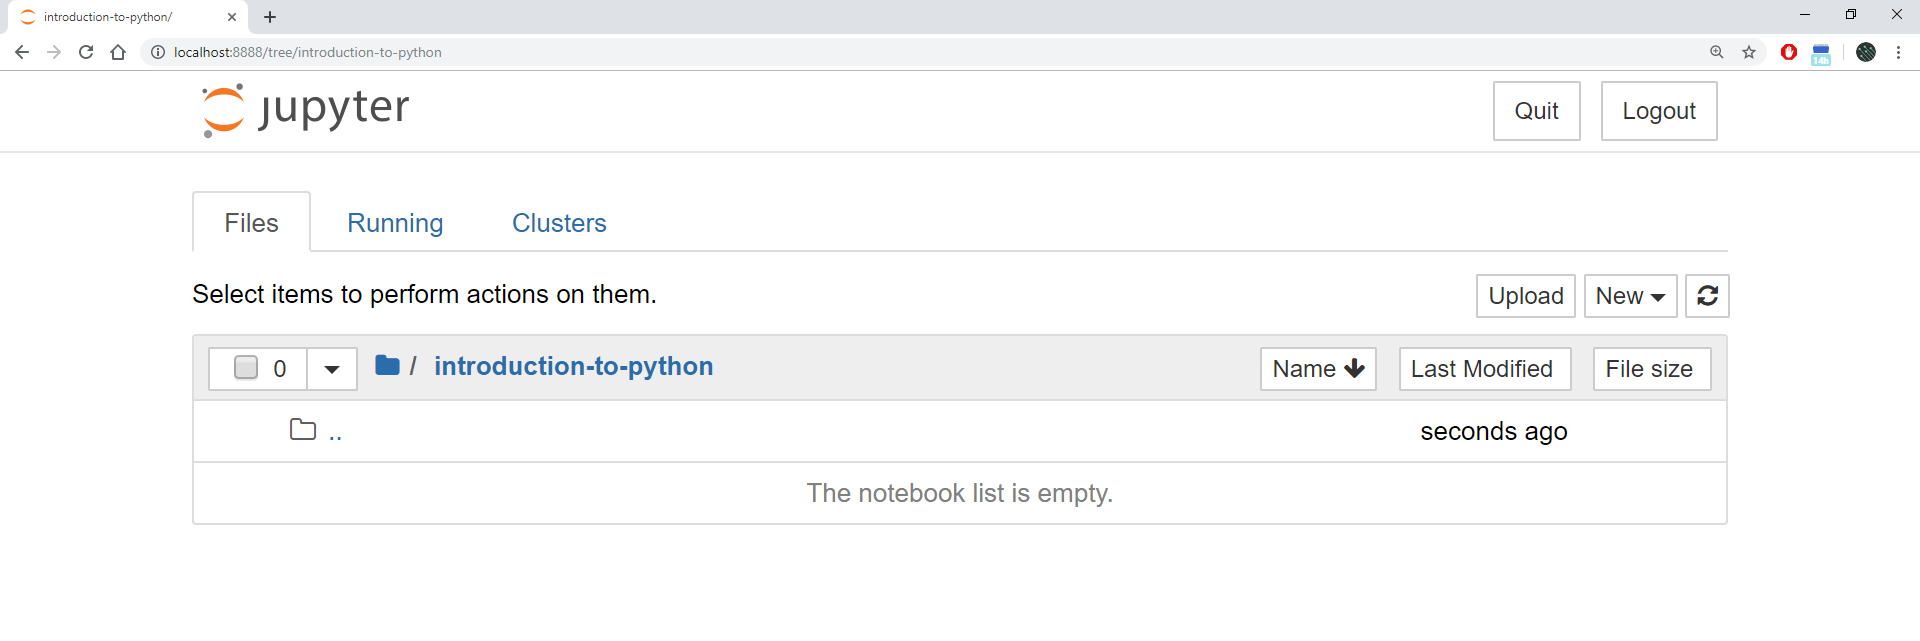
In Anaconda Navigator, select the Launch button beneath Jupyter Notebook. This will launch your default internet browser and automatically navigate to http://localhost:8888/tree by default. If successful, then a screen similar to the screenshot below showing a filesystem view of your local machine should be returned:

2.8. A Quick Tour of Jupyter Notebook
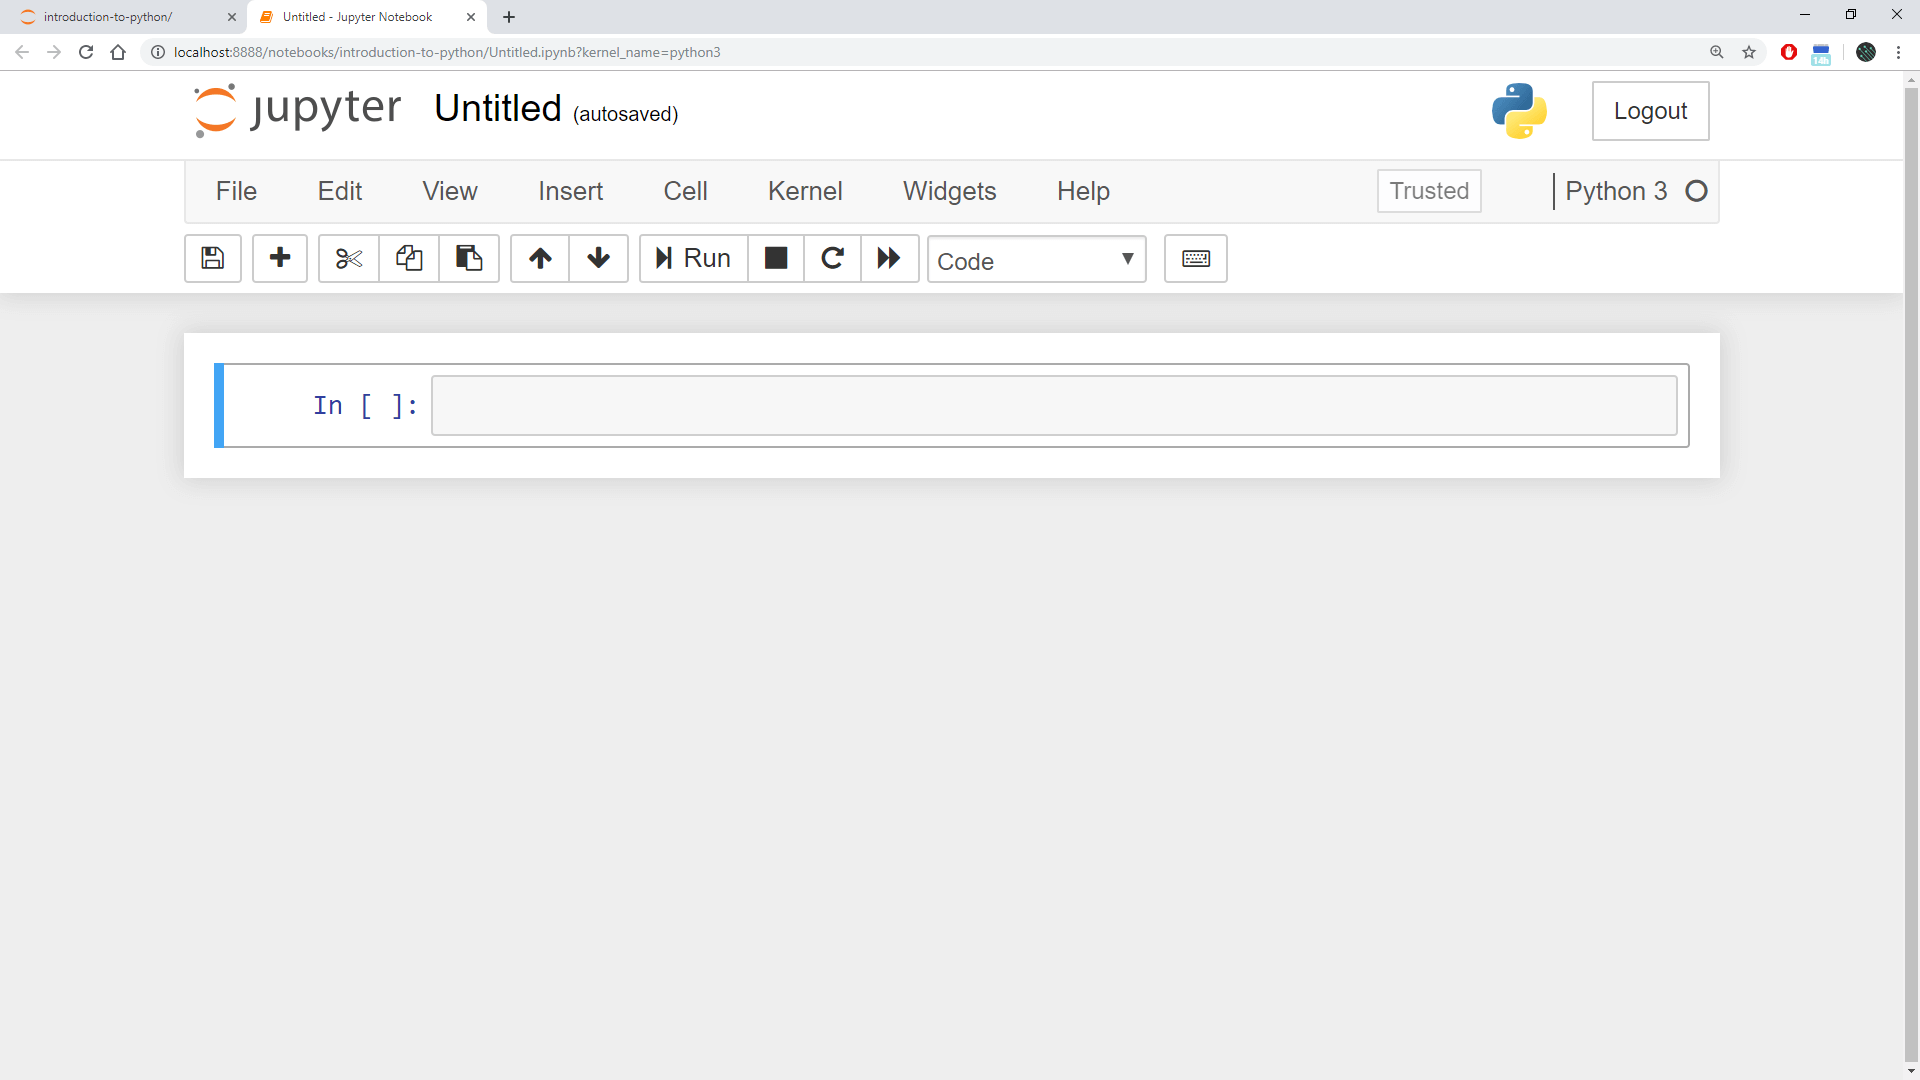
To create a new Jupyter Notebook, select the New dropdown menu from the Jupyter Notebook filesystem view and select Python 3. This will open a new tab containing our very first Jupyter Notebook as follows:

Some basic and commonly-used Jupyter Notebook web-application-specific actions are listed below for your reference. Please explore the web application further to familiarise yourself with the Jupyter Notebook web interface.
- Cells - In Jupyter Notebook, Python code snippets are written into cells. The first cell is highlighted by default as shown in the image above.
- Executing Cells - To execute the code snippet in a particular cell, select that cell and press Run. If the cell is expected to generate any form of output, that output will appear immediately beneath the cell in question.
- Adding Cells - To add a new cell, press the + button. This will add a new cell immediately beneath the current active cell.
- Markdown Cells - To insert Markdown syntax into a cell instead of Python code, highlight the cell in question and select the dropdown menu in the toolbar entitled 'Code'. From the resultant dropdown menu, select 'Markdown'. This is useful for when you want to include HTML headings and further descriptions into your Jupyter Notebook.
- Renaming Notebooks - To rename your Jupyter Notebook, select 'Untitled' at the top of the screen and enter a new notebook name. In this case, type 'Hello World'.
- Saving Notebooks - To save your Jupyter Notebook, press the Save and Checkpoint button. This will save the Jupyter Notebook in its current state, including all cells and their outputs.
- Restart the Python Interpreter - To restart the Python Interpreter, select 'Kernel' from the main menu and press 'Restart'. Note that this will NOT clear the Python code in your Jupyter Notebook cells, but rather it will clear the space in memory being managed by the Python Memory Manager. As such, you will need to re-run any relevant cells in order to store any relevant variables, objects and data structures that are used by your Python program and referenced in subsequent cells.
2.9. Hello World
We are now ready to write our very first line of Python source code. Our first Python program will simply print the phrase 'Hello World' to the screen. To do this, select the first cell in your Jupyter Notebook, enter the following Python code and then run the cell:
print("Hello World")
If successful, the text 'Hello World' should appear immediately beneath the cell in question as follows:

Congratulations! You have now written your very first Python program!
Summary
In this module we have explored the high-level components of the Python programming language. We have a basic understanding of the Python Interpreter, Memory Manager and the Python Standard Library, and an understanding of the difference between Python modules and packages. Finally, we have installed the Anaconda Python distribution and created a new Jupyter Notebook in which we have developed and executed our very first Python application.
Homework
We will continue to use Jupyter Notebook for the remainder of this course, so as a homework exercise please spend some time familiarising yourself with its web interface including testing all its various menus, buttons and features.
What's Next?
In the next module, we will start exploring the fundamental building blocks of the Python programming language including comments, indentation, identifiers, keywords, literals and operators.
Curriculum
